Die Tentakel des orcharhino – Deployen mit vielen Subnetzen
Manuelles und individuelles Einrichten bzw. Deployment von Servern ist eine mühselige Aufgabe. Doch Moment mal – es gibt ja orcharhino, der genau dies automatisiert. Mit unserem Tool zur Datacenter-Automatisierung lassen sich Hosts per Knopfdruck konfigurieren, provisionieren und deployen.
Doch nehmen wir mal folgendes an: Es sollen Server in verschiedenen Außenstellen oder in abgeschotteten Netzsegmenten (DMZ) betriebene Hosts mit stark limitiertem Zugriff nach außen zentral verwaltet werden. Hier schafft der orcharhino Proxy Abhilfe.
Dieser agiert als „Ansprechpartner“ für den orcharhino. Für das weitere Vorgehen entstehen nun zwei Möglichkeiten: Standardmäßig werden die Host-Repositorys auf allen Proxys direkt gespiegelt. Da sich jeder Host direkt an das Subnetz des zugehörigen Proxies wendet, wird hoher Traffic vom und zum orcharhino vermieden. Für Server innerhalb einer DMZ wird dadurch nur noch eine Ausnahme in der Firewall benötigt, damit die Kommunikation zwischen Subnetz und orcharhino gewährleistet ist.
Sind jedoch viele Subnetze im Einsatz, besteht die Gefahr, dass der Resource Speicherplatz knapp wird. Denn in einem solchen Fall muss der identische Inhalt vielfach an verschiedene Orte gespiegelt werden. Doch dies kann umgangen werden, indem der Proxy so konfiguriert wird, dass Anfragen der Hosts direkt an orcharhino durchgereicht werden. Dies funtkioniert wie folgt:
1.) Installation:
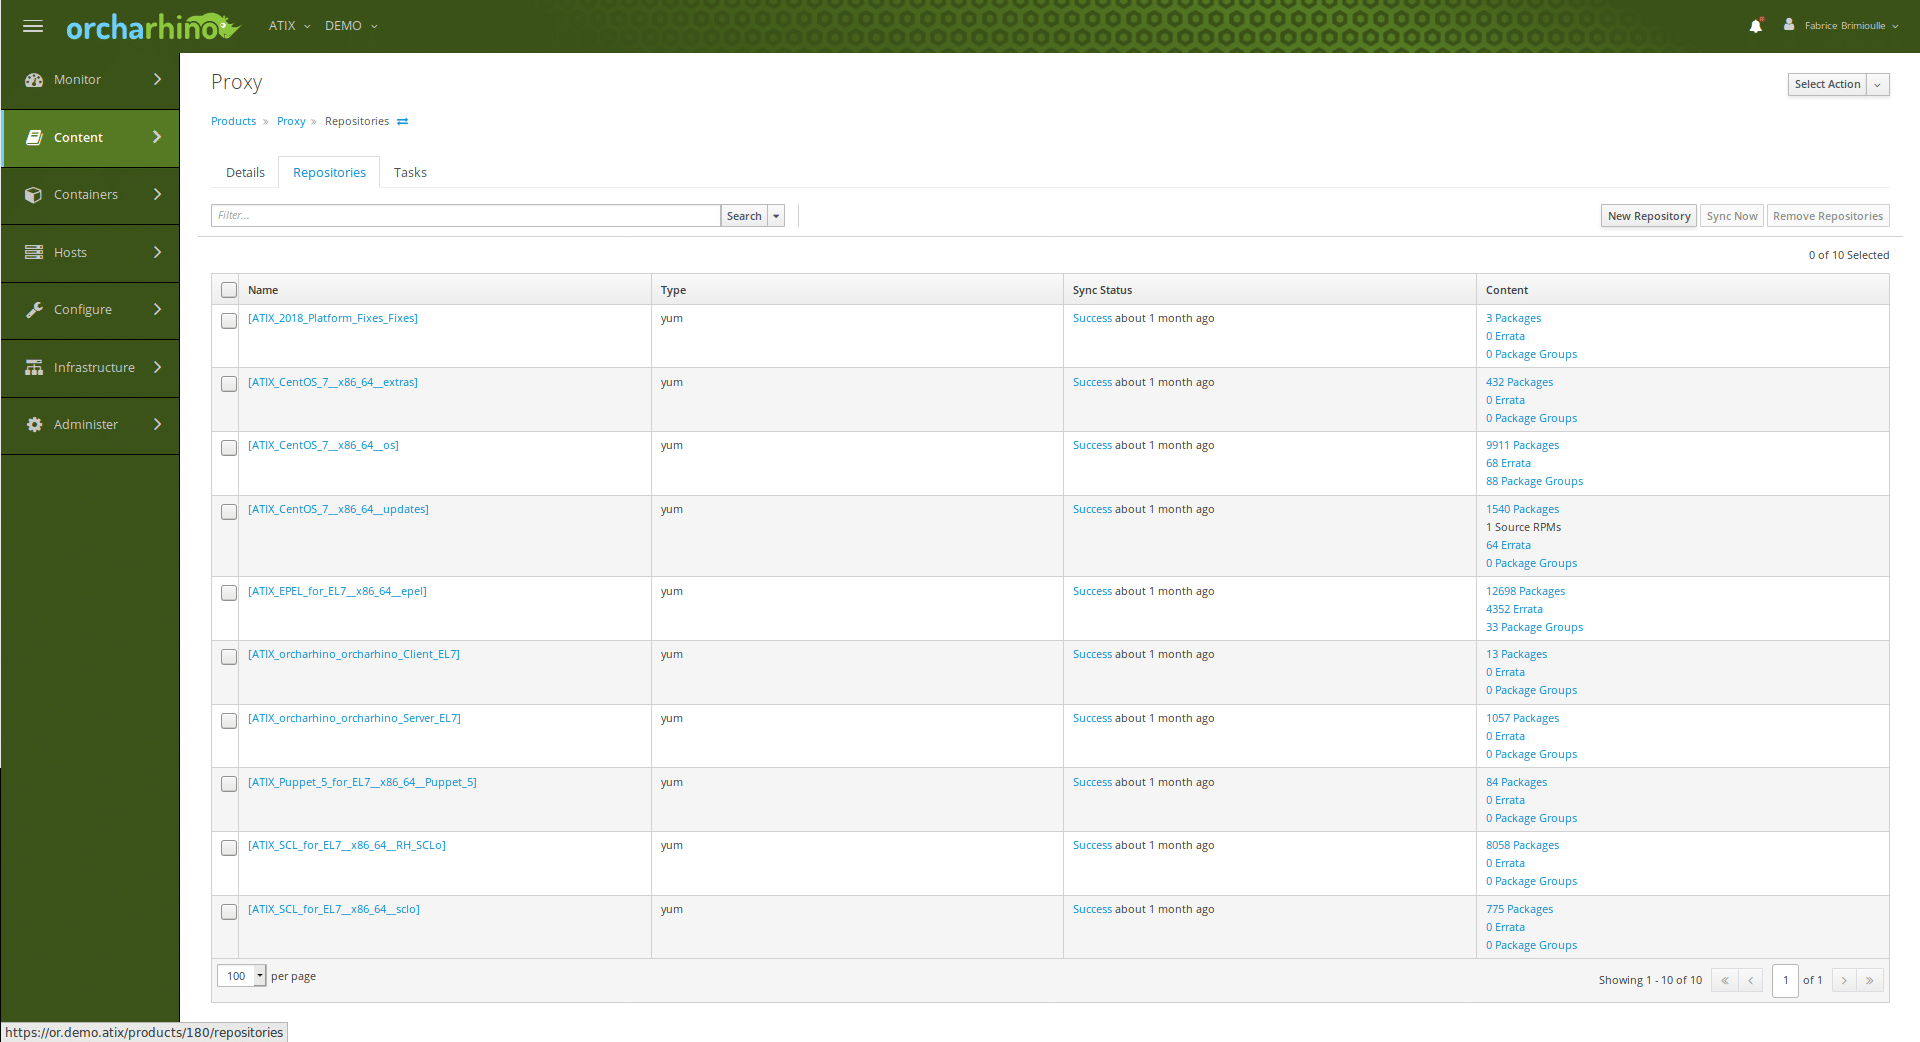
Zunächst wird eine virtuelle CentOS Maschine im zugriffsbeschränkten Netz (z.B. über VMWare oder direkt über orcharhino) deployed. Auf dieser Maschine wird der Proxy eingerichtet. Für die Installation von diesem werden im nächsten Schritt die orcharhino Pakete benötigt. Um diese zu bekommen, muss auf dem orcharhino der entsprechende Punkt angelegt und die Repositorys synchronisiert werden:
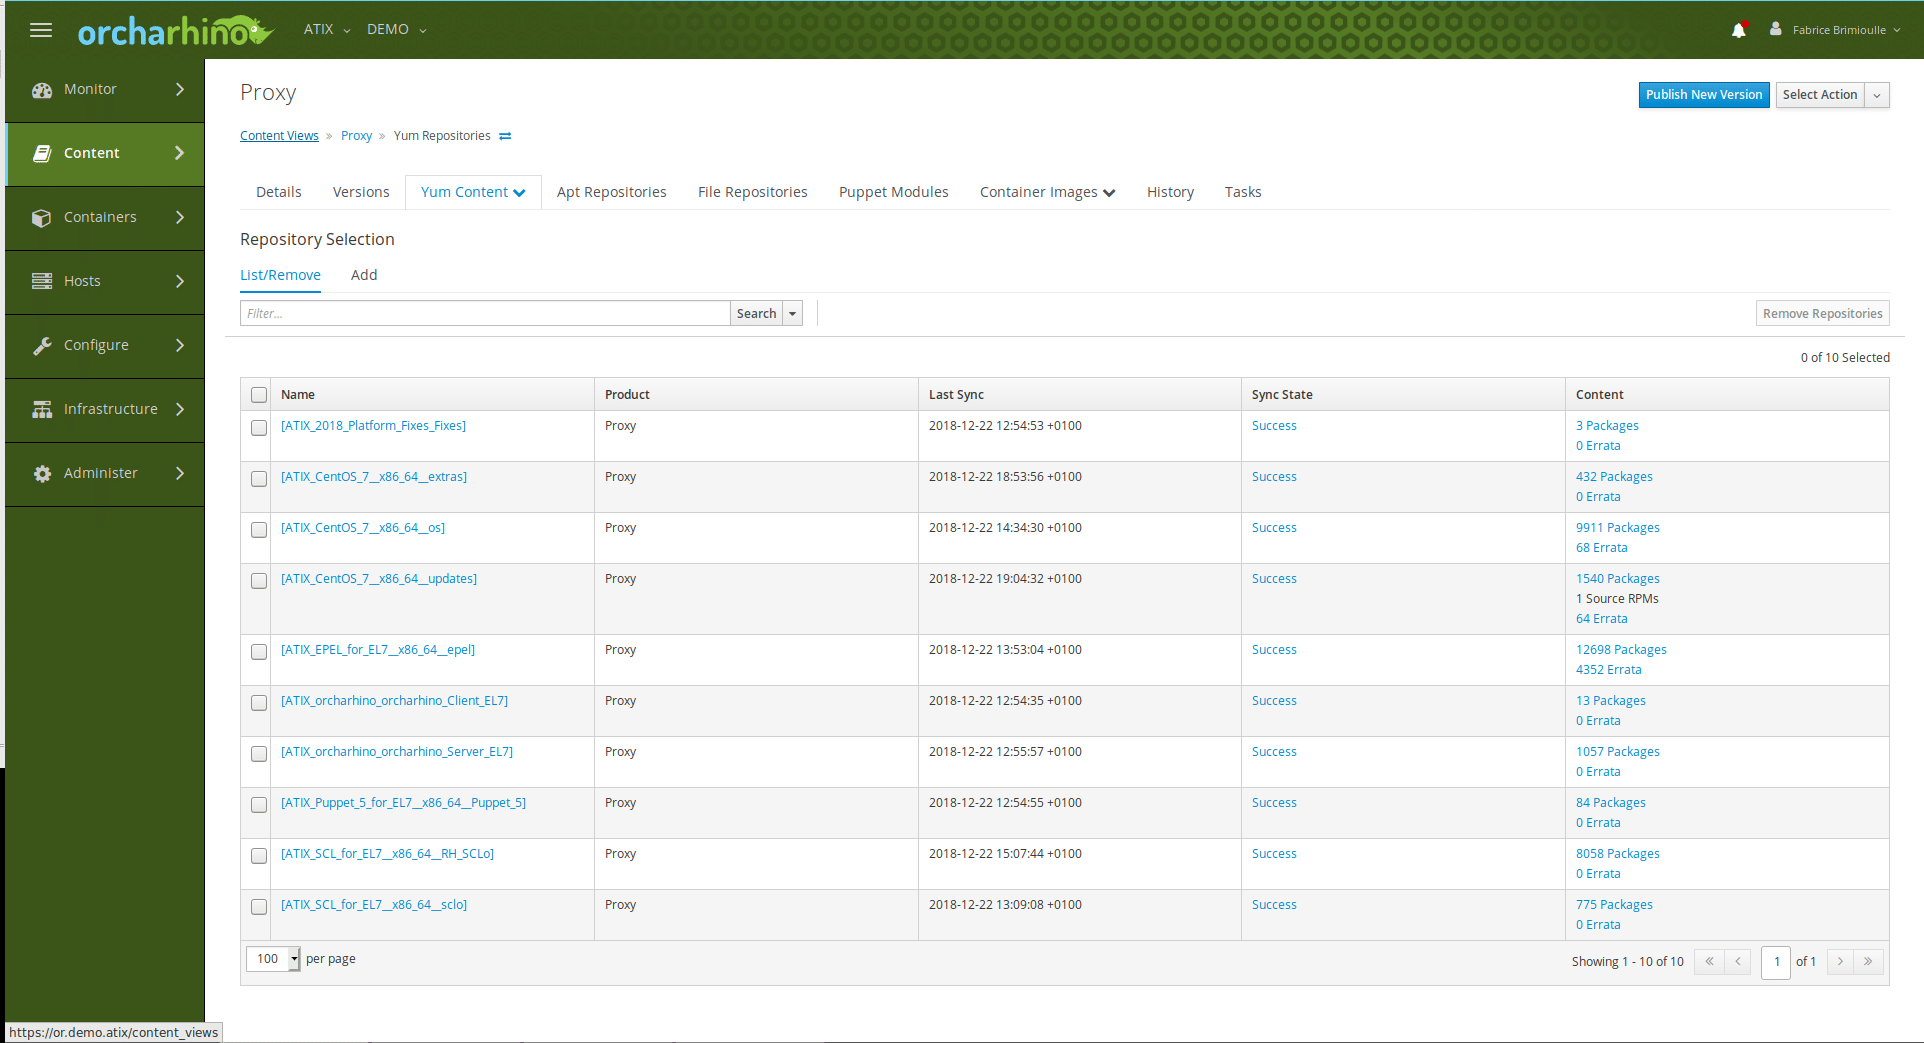
Daraus wird nun der Content View erstellt:
und Activation Key erzeugt:

Im nächsten Schritt muss sichergestellt werden, dass der Proxy den Namen des kennt. Dafür gibt es zwei Möglichkeiten. Entweder man trägt den orcharhino mit Namen und IP-Adresse in die /etc/hosts ein oder man schreibt den DNS, in dem der orcharhino registriert ist, in die /etc/resolv.conf. Im Anschluss wird der Proxy Host am orcharhino mit dem Activation Key registriert. Mit dem Befehl
yum -y -t install orcharhino
werden die orcharhino Pakete installiert
Sobald die Pakete installiert sind, wird mit der Einrichtung der Proxys fortgefahren. Zur Vermeidung von Fehlermeldungen muss hier gewährleistet sein, dass orcharhino den Namen des neuen Proxys kennt. Hierfür muss der Proxy einfach im DNS eingetragen werden. Nun kann in der orcharhino-Konsole das Zertifikat für den Proxy generiert werden:
foreman-proxy-certs-generate --foreman-proxy-fqdn "" --certs-tar "~/-certs.tar"
Dieses wird im Anschluss auf den Proxy kopiert. Im nächsten Schritt wird auf der Konsole des Proxys mittels des foreman-installers der Installationsbefehl für den Proxy-Content ausgeführt. Praktischerweise werden die Befehle für das Kopieren und das Installieren auf dem orcharhino unmittelbar nach Generierung des Zertifikats angezeigt. Für die reibungslose Kommunikation zwischen orcharhino, Proxy und den Hosts muss beim Installer noch der Parameter –enable-foreman-proxy-plugin-pulp hinzugefügt werden. Obwohl der Proxy noch nicht ganz zu Ende konfiguriert ist, ist er nun aktiviert.
2.) Konfiguration:
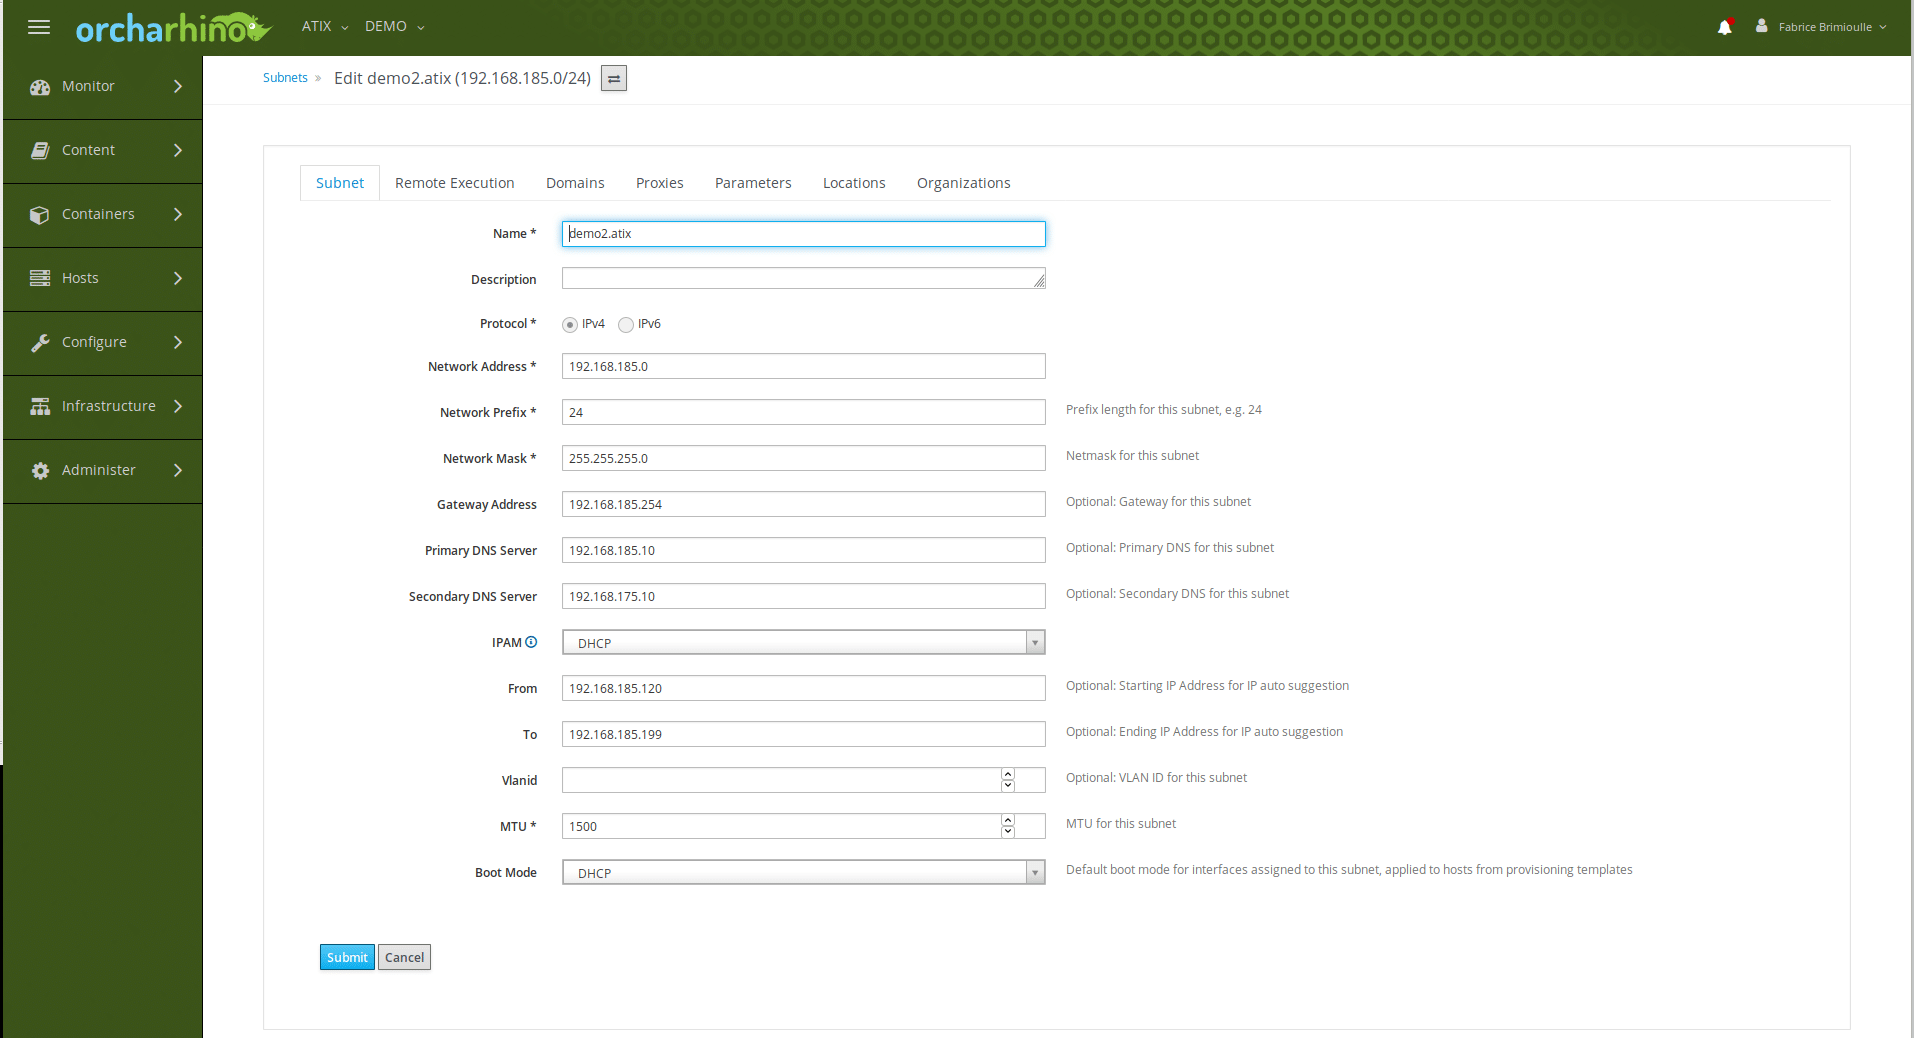
Im nächsten Schritt muss das Subnetz im orcharhino angelegt werden.
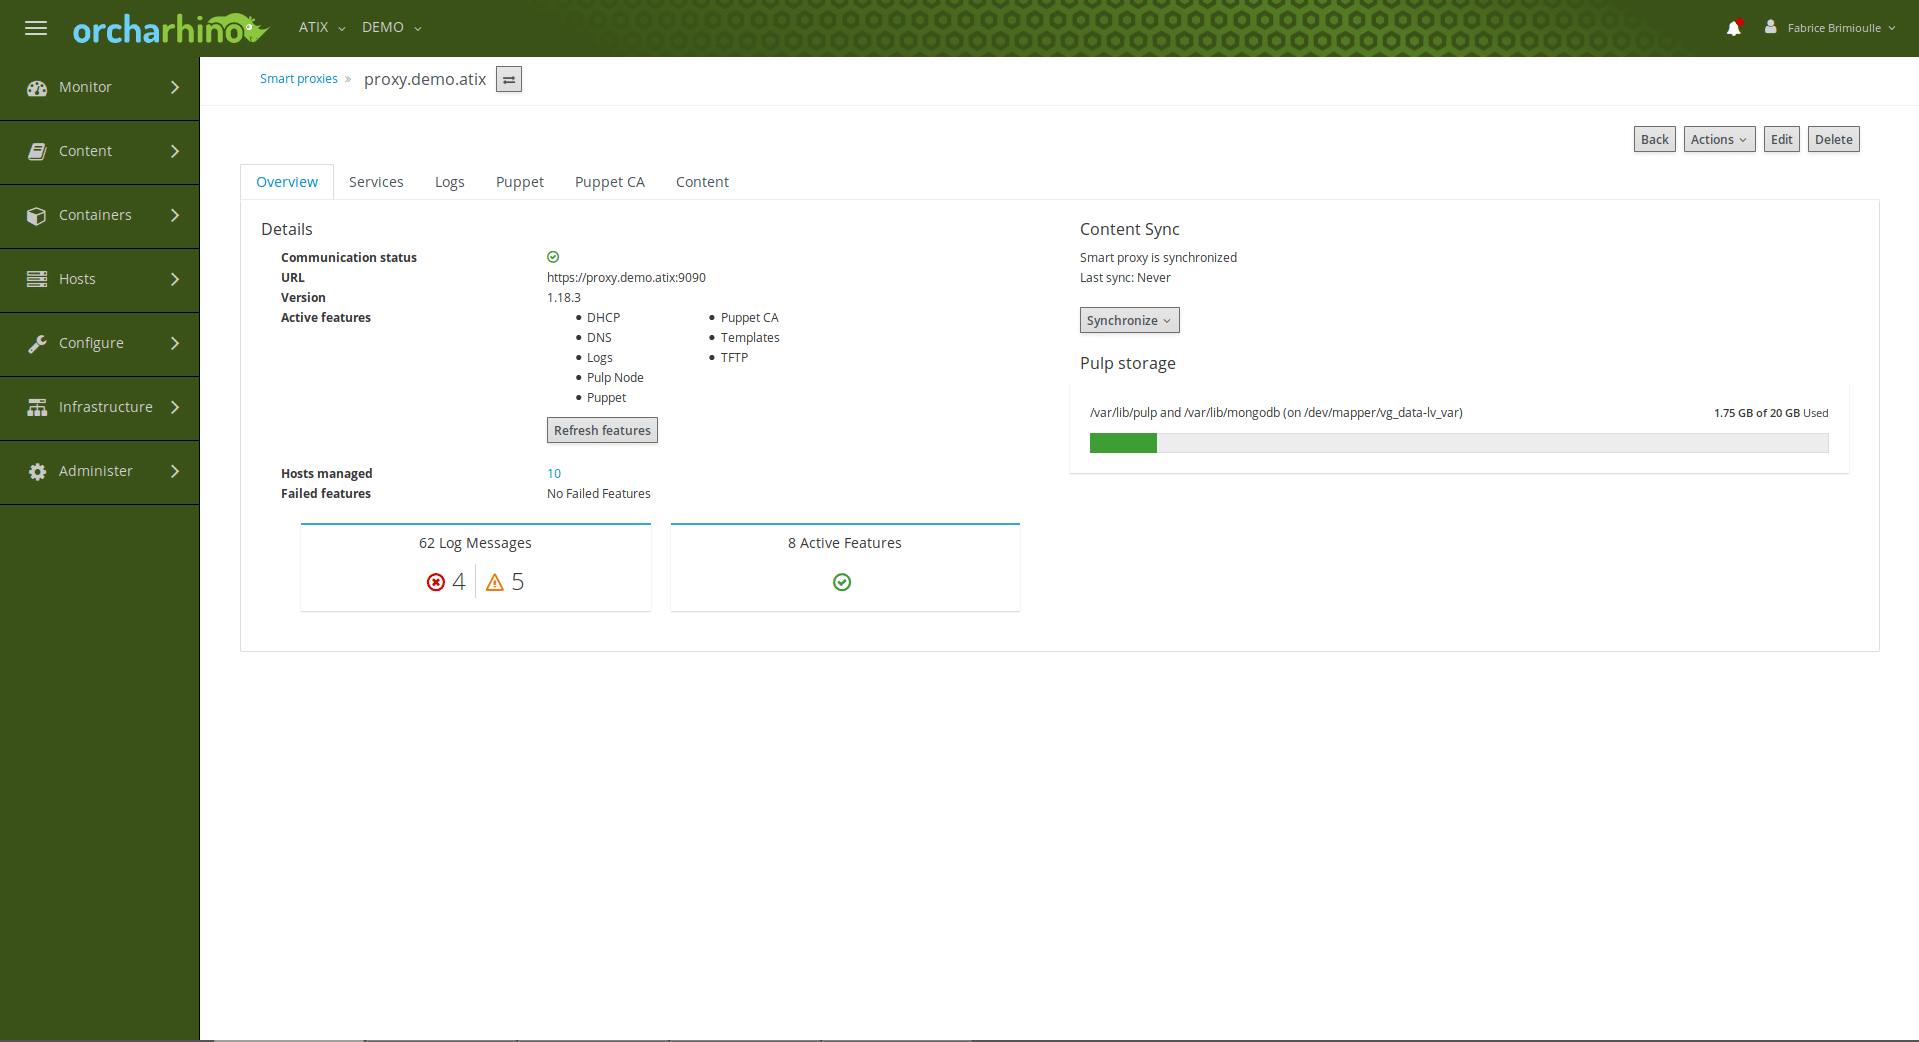
Der Proxy wird nun der Organization und der Location zugewiesen, allerdings keinem Lifecycle. Zur Spiegelung des Contents auf dem Proxy muss dieser zunächst synchronisiert werden.
Sollte für die Synchronisation nicht ausreichend Speicherplatz zur Verfügung stehen, muss in den Einstellungen angegeben werden, dass die über den Proxy angebundenen Hosts ihre Pakete nicht direkt von diesem, sondern über den Proxy Server vom orcharhino beziehen. Das geht ganz einfach, indem man den Proxy Server Dienst squid konfiguriert (der bereits bei Installation des Proxy Contents mitinstalliert und gestartet wird).
In beiden dargestellten Fällen werden die Hosts im betreffenden Subnetz nicht am orcharhino, sondern am Proxy registriert. Wenn die Pakete aber nicht vom Proxy, sondern vom orcharhino bezogen werden, muss man zusätzlich als baseurl für die Paketversorgung den orcharhino selbst als Quelle angeben.
subscription-manager register –baseurl=/pulp/repos --org=ATIX --activationkey=centos7-lib
Abschließend muss dies dem Paketmanager noch mitgeteilt werden.
Somit sind verschiedene Netzwerke und Zonen für eine Verwaltung mit orcharhino kein Problem. Diese können mit einem orcharhino versorgt werden ohne umständlich für jeden Host neue Firewall-Regeln erstellen zu müssen. Außerdem muss ein Proxy nicht einfach nur ein Proxy sein, er kann in den entsprechenden Zonen auch Puppet Master, DNS- oder DHCP-Server sein oder weitere Aufgaben übernehmen.
The Tentacles of orcharhino – Deploying with Many Subnets
Manually and individually setting up or deploying servers is a tedious task. But wait a minute – there’s orcharhino, which automates just that! With our data center automation tool, hosts can be configured, provisioned and deployed at the touch of a button.
But consider this: Servers in different branch offices or in isolated network segments (DMZ) should be managed centrally with strongly limited access to the outside. This is where the orcharhino proxy comes in.
This acts like a „contact parter“ for orcharhino. There are now two options for further action: By default, the host repositories are mirrored directly on all proxies. Since each host directly addresses the subnet of the corresponding proxy, high traffic to and from orcharhino is avoided. For servers within a DMZ, only one exception in the firewall is required to ensure communication between the subnet and orcharhino.
However, if many subnets are in use, there is a risk that resource space will be scarce. In such a case, the identical content must often be mirrored to different locations. However, this can be bypassed by configuring the proxy to pass requests from the hosts directly to orcharhino. This functions as follows:
1.) Installation:
First, a virtual CentOS machine is deployed in the restricted network (e.g. via VMWare or directly via orcharhino). The proxy is set up on this machine. The next step is to install the orcharhino packages. To get them, the appropriate point must be created on the orcharhino and the repositories synchronized:
The Content View is now created from this:
and Activation Key as well:
The next step is to make sure that the proxy knows the name of the proxy. There are two ways to do this. Either you enter the orcharhino with name and IP address in the /etc/hosts or you write the DNS in which the orcharhino is registered to the /etc/resolv.conf. The proxy host is then registered on orcharhino with the Activation Key. With the command
yum -y -t install orcharhino
the orcharhino packages are installed
Once the packages are installed, the proxies will continue to be set up. To avoid error messages, it must be ensured that orcharhino knows the name of the new proxy. To do this, the proxy simply has to be entered into the DNS. Now the certificate for the proxy can be generated in the orcharhino console:
foreman-proxy-certs-generate --foreman-proxy-fqdn "" --certs-tar
This is then copied to the proxy. In the next step, the installation command for the proxy content is executed on the console of the proxy using the foreman-installer. Conveniently, the commands for copying and installing on the orcharhino appear immediately after the certificate is generated. For smooth communication between orcharhino, proxy, and the hosts, the installer must add the -enable-foreman-proxy-plugin-pulp parameter. Although the proxy is not yet fully configured, it is now enabled.
2.) Configuration:
In the next step, the subnet must be created in orcharhino.
The proxy is now assigned to the organization and location, but not to a lifecycle. To mirror the content on the proxy, it must first be synchronized.
If there is not enough storage space available for the synchronization, you must specify in the settings that the hosts connected via the proxy do not receive their packets directly from the proxy server, but via the proxy server from orcharhino. This is very easy by configuring the proxy server service squid (which is already installed and started when installing the proxy content).
In both cases shown, the hosts in that subnet are registered on the proxy rather than on orcharhino. However, if the packets are not obtained from the proxy, but from orcharhino, you must additionally specify orcharhino itself as the source as the baseurl for the package supply.
subscription-manager register -baseurl=/pulp/repos --org=ATIX --activationkey=centos7-lib
Finally, the package manager has to be informed about this.
Thus different networks and zones are no problem for an administration with orcharhino. They can be supplied with orcharhino without having to create new firewall rules for each host. In addition, a proxy does not have to be just a proxy, it can also be a Puppet Master, DNS or DHCP server in the appropriate zones, or perform other tasks.